Kenya Cup Map Preview
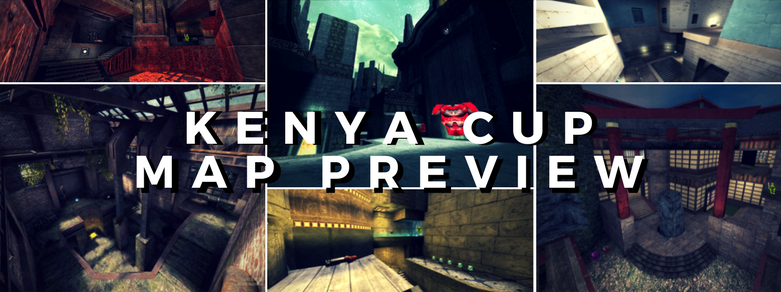
With the CPMA Kenya Cup scheduled for next week I sat down with Black and we discussed the various maps that are on the tournament's map list. The point of this piece is to give people unfamiliar with the maps some frame of reference with respect to the major areas and items, as well as discussing some rudimentary strategies. We talked about what we liked, what we didn't like, what we anticipated on working and what sort of strength(s) each map required for players to win. We went through the maps alphabetically discussed them for a few minutes, played a duel, and then discussed further. Below you will fine a synopsis of our discussions.
This is by no means an exhaustive guide on the various, generally undiscovered, nuances of the map. In truth as most of these maps are under active development it may be the case that the sort of things which work now may not in a future version. We also dueled on all the maps to give us a sense of the spacing between areas, atriums, and items.
P.S. Don't forget to

|
Author Development Status Items Weapons |
Terifire Ongoing |
We started our run through of the maps with calendar. It is a small duel map consisting of two smaller atriums arranged in a figure-eight. There is an upper loop which will take you around the map, and lower levels can be looped via teleporters. The map features a standard loadout in terms of items, and includes all weapons. Currently the items are all clustered in very close proximity and as a result maintaining control of all major items is quite possible. As a result of the map being resource heavy on one side the first frag is quite crucial as it means gaining a considerably superior economy. Players out of control need to utilize the some of the longer lines of sight and chip away the enemy stack before making any move on the red armor. Being starved for resources does not make this mean that out of control players cannot play defensively as the map has very clean loops, coupled with an across-the-map teleporter. Players can utilize this to constantly stay out of danger.
Our general opinions of this map were quite favorable, and it has a lot of potential. One of the areas we thought the map could be immediately improved would be to better space out the major items, and potentially put greater distance between the yellow armors, giving the out of control player a safer option of find an armor, as well as making complete control of the map more difficult. Further more, the map still feels a bit block-y, however it did not impede movement at all. We'd like to see a bit more variety in terms of the atriums, and maybe making the upper-loop a bit more varied.

|
Author Development Status Items Weapons |
Scorch_ Ongoing |
The next map we played was dojo. In contrast to calendar which is a smaller, fight first map, dojo is striking for two reasons: firstly it does not feature a rail gun, secondly it is by CPMA standards a "larger" map. The map's size forces a slower, lower scoring game, however the red armor room, and the mega health area both were good places for dynamic fights. The rooms containing the major items, and their connection points, allowed for smooth and quick passage from the lower routes with clearly defined positions for the player in, and the player out, of control. The upper level is naturally harder to traverse but the positional advantages are huge, yet the come at expense, three out of the four major items are on the lower level. The upper yellow armor gives great information on both the red armor and the mega health but leaves enough distance that it forces player to make a decision with respect to which item they would rather obtain. Although the map has great flow, there were some areas where movement seemed to be hindered e.g. the stairs leading to the red armor, or the uneven grounds around the lower yellow armor -- this may just be remedied with more experience on the map.
Success on this map will require excellent awareness of their enemy's position, and attention the sound queues. Scorch has done an excellent job of ensuring that there adequate amount of aural triggers so players cannot hide for ten minutes. Players looking to wrestle control back from their opponent will need to be sneaky in stacking up armors, and successfully mounting a trap. The lack of a rail gun also means that players do not need to worried about being constantly hit for 80 damage across a large map without any means of closing the game. I think the combination of factors gives this map an opportunity to be very cerebral. We both agreed that the area where the railgun is (locked in a position that cannot be accessed) requires some work.

|
Author Development Status Items Weapons |
Terifire Ongoing |
Fata Morgana is another creation by the Terfire. It features a standard loadout in terms of items and weapons but does not feature a railgun. The red armor is quite heavily inspired by cpm22, and the mid area may also give flashbacks to the same map. The map is one large atrium connected by a series of smaller rooms which can be accessed by way of a top loop. The overall scale of the map feels a little bit larger than what players are used to, however, this has allowed for some very clean fighting areas like the centre of the atrium where the mega health is located. A knock-on effect of this larger scale is that rocket usage has be more intelligent, and aggressive rocket play is harder to successfully execute. Players in control will primarily scouring the centre of the map with the lightening gun as the map a result of the map's dimensions. Moving through the map is quite effortless, and the combination of teleporters and geometry allows for players to weasel their way out of losing fights.
Players on the outside will be able to get a safe pickup on the lower yellow armor as Terifire has done a good job of defining strong and weak points of the maps without over-rewarding the player control or starving the player out of control. Even though we have mentioned that the scaling is a bit large, the map is still quite small, and will reward strong mechanical play. One of the fun quirks in the map is the grenade launcher shoot which has your pineapples landing on the mega health and on anyone haphazardly sitting on it. Much like calendar this map is a bit blockier than what most players will expect from a map in CPMA, and could use some curves to help make it feel and look less square. All-in-all another map with great potential.

|
Author Development Status Items Weapons |
Fjoggs Ongoing |
After a long hiatus from mapping, Fjoggs returns with latest CPMA project in the form of Fjo3tourney6. Undoubtedly the most visually striking and aesthetically complete map out of the levels currently in development. Showcasing his mastery of Radiant, this map features very clean texture work, brush work, and lighting. It is a small (quite possibly the smallest map in the cup) single atrium map, connected by a lower loop. One thing I noticed was how open this map is, as it features some very clear line of sights between major areas. This combination of how small it is, and how open it is, means that players with better aim are going fare the two players will constantly run into each other. Or put more clearly: it's damn hard to hide. This doesn't mean however that it is easy to chase, the map is packed full of nooks and crannies which players can wind themselves around if they are being chased. The map flows really well and there are very clear paths which connect areas nicely, meaning getting from here to there is a breeze. Furthermore the map features lots of different tricks which allow players with greater movement skills to either hunt or escape their opponent.
This is a very pure brawling-style map, however, this does mean it will not suite some players. We both thought the open areas of the map, and some of the line of sights could be reduced or the railgun could be taken out of the map. The lower yellow armor by the railgun also felt excessively dangerous to pickup as it is a very hard trap and the risk-reward did not make sense. It would be great to see this item moved to another area such as the upper levels where the upper rocket launcher is as it currently severely underutilized. The lack of resources or positional advantage meant that regardless of the situation, it made little sense to go there.

|
Author Development Status Items Weapons |
greed Ongoing |
When we first loaded Quickfire it was clear from the aesthetic style that cpm22 was a big inspiration. After a few games it's clear that this map has it's own flow and style which is makes quite different from any maps which it may look like. The variety of movement options mean that players with superior movement will be able to run through the map with much greater efficiency and there is some sort of double-jump available almost at every point of the map. It is another single atrium map but I would not describe it as small. It has a deep center, and a very dangerous red armor.
This map's item loadout is unique as it features three strong armors and a weak armor, meaning there will always be plenty of resources on the map. With the exception of the green armor, all the other items are big time traps that can be easily punished. In fact in the games that I've played picking up red armor is not early as important as cycling the mega health and one of the yellow armors. The placement of the red armor means you are constantly vulnerable to be heavily punished as you can hit the person going for it from a plethora of angles. In control play was successful when circling the top of the map between the mega health and upper yellow armor as it gave vision (and the ability to do deal damage) on the red armor, locking out the other player to the single lower yellow armor. If you're out of control, you'll be spending a decent amount of time in that little room -- just keep stacking up :)

|
Author Development Status Items Weapons |
Pat Howard Final |
The final map for this piece is Trespass. It is a wonderfully detailed map and bears similarities to Bloodrun, and those similarities can go pretty deep. This is a large map with multiple multi-leveled rooms that are connected by intricate hallways. There is a very fast upper loop which has passes three of the four major items on its path, with the fourth item (the second yellow armor) tucked away on the lower level next to the rail gun. All the items are traps but there is at least enough cover to grant a fair risk-reward.
The map has very good flow from area to area even though it may have not been made with CPMA in mind. The jump distances feel very natural, and there are very simple and obviously laid out trick jumps (mainly in the form of ramp jumps). The pacing on this map between evenly matched opponents will be quite slow and deliberate as players can go long periods without even seeing their opponent. This evasiveness means that frags will not be easy to come by. A strange thing we noticed about this is map is the sheer volume of spawns, there are at least six to seven in the red armor room alone! My general expectation is that the pace of this map is going to put a lot of players off. Both of us really liked it!
Links: